BizCop Theme Documentation
visit roninwp.comMain Container
This is element to display: page title, content of page or post. To add main container to page template, please do follow:
- Log into your WordPress admin panel.
- Navigate to Page Template » Add New.
- Click 'FAT Page Builder' button to switch page builder mode
- Input name of page template
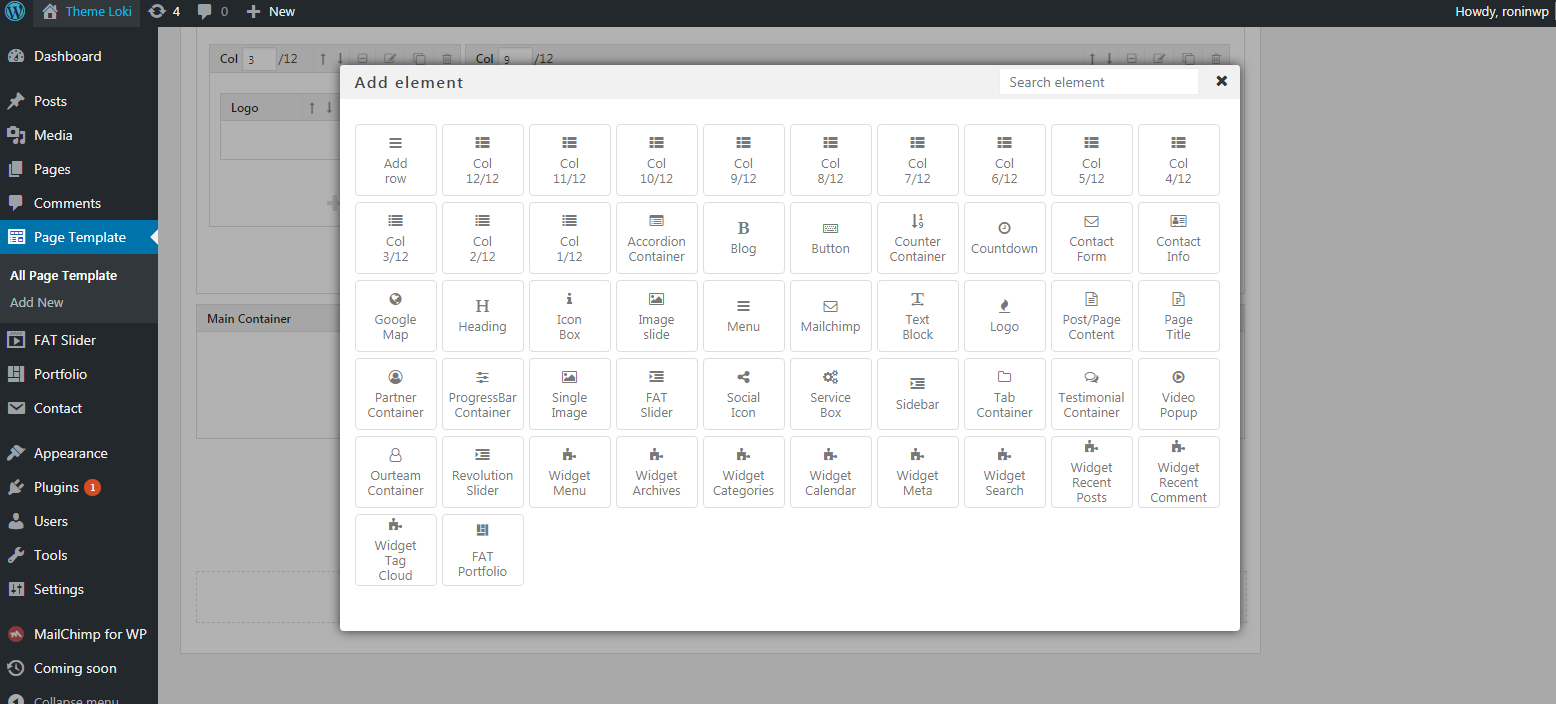
- Choose 'Main Container' element in 'Layout Options' group
- Click edit icon to change main parameter
- Click 'Save' button to save change
Step to add main container is same header container, you can view add header container at here
General Setting
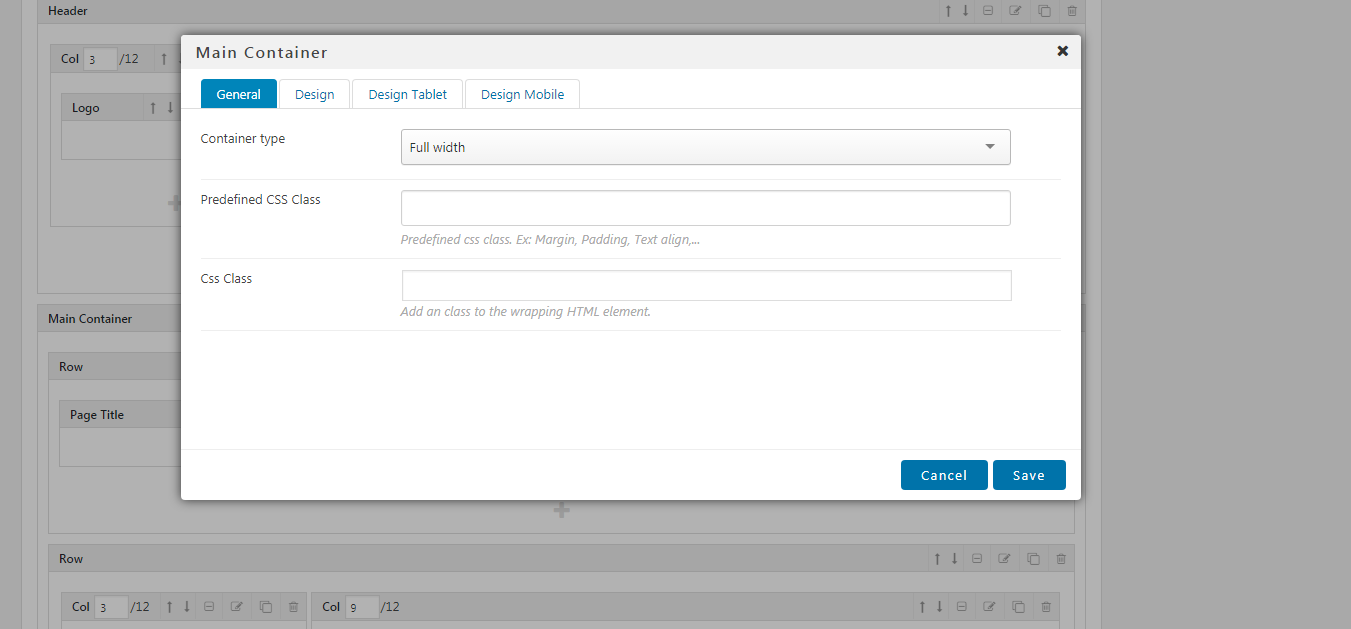
- Content width:
- Full width: With this option, content of header is full width and don't have padding left and right
- Container: With this option, the maximum width of content is 1170 pixel
- Container Fluid: With this option, content of header is full width and have padding left 15 pixel and padding right 15 pixel
- Predefined CSS Class: This is predefined css class to set Margin, Padding or Text Align. Ex: If you want to set margin top 50 pixel, you need typing "Margin top 50" and choose value in dropdown and enter
- Css Class: Some case, if you want set your css class to element. You can input at here
The 'Design', 'Design Tablet', 'Design Mobile' is same Header, you can view at here
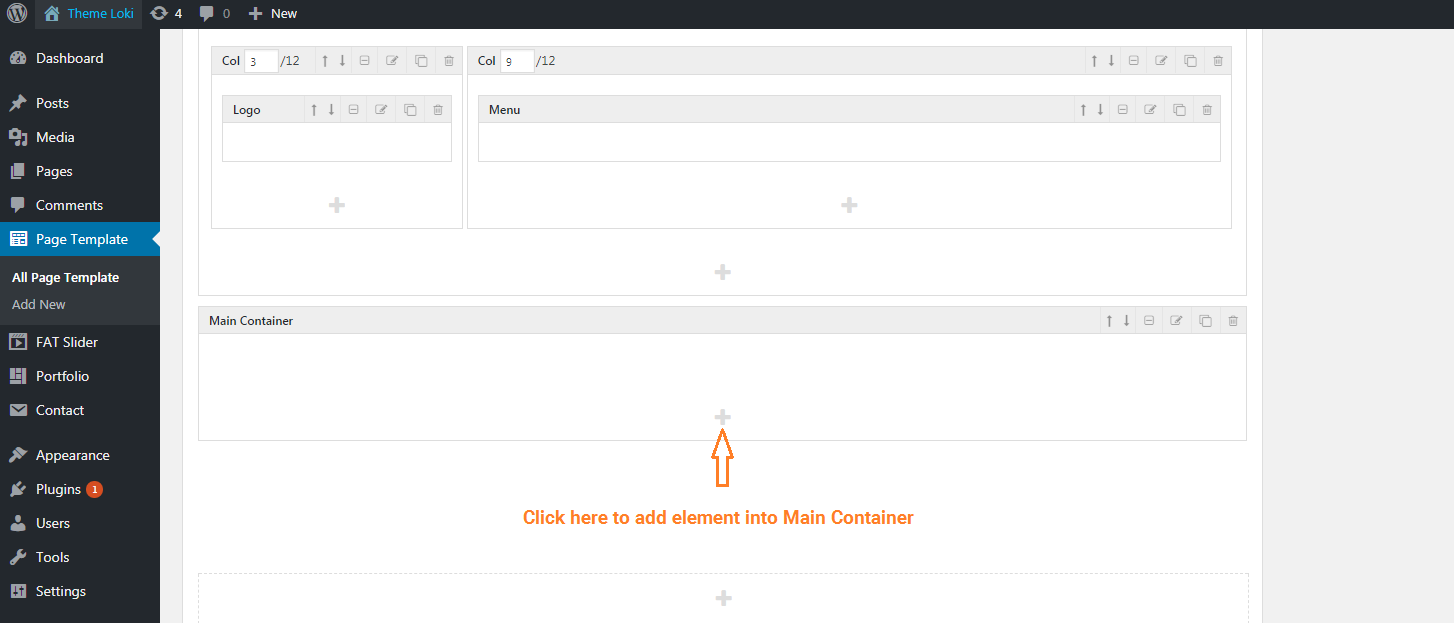
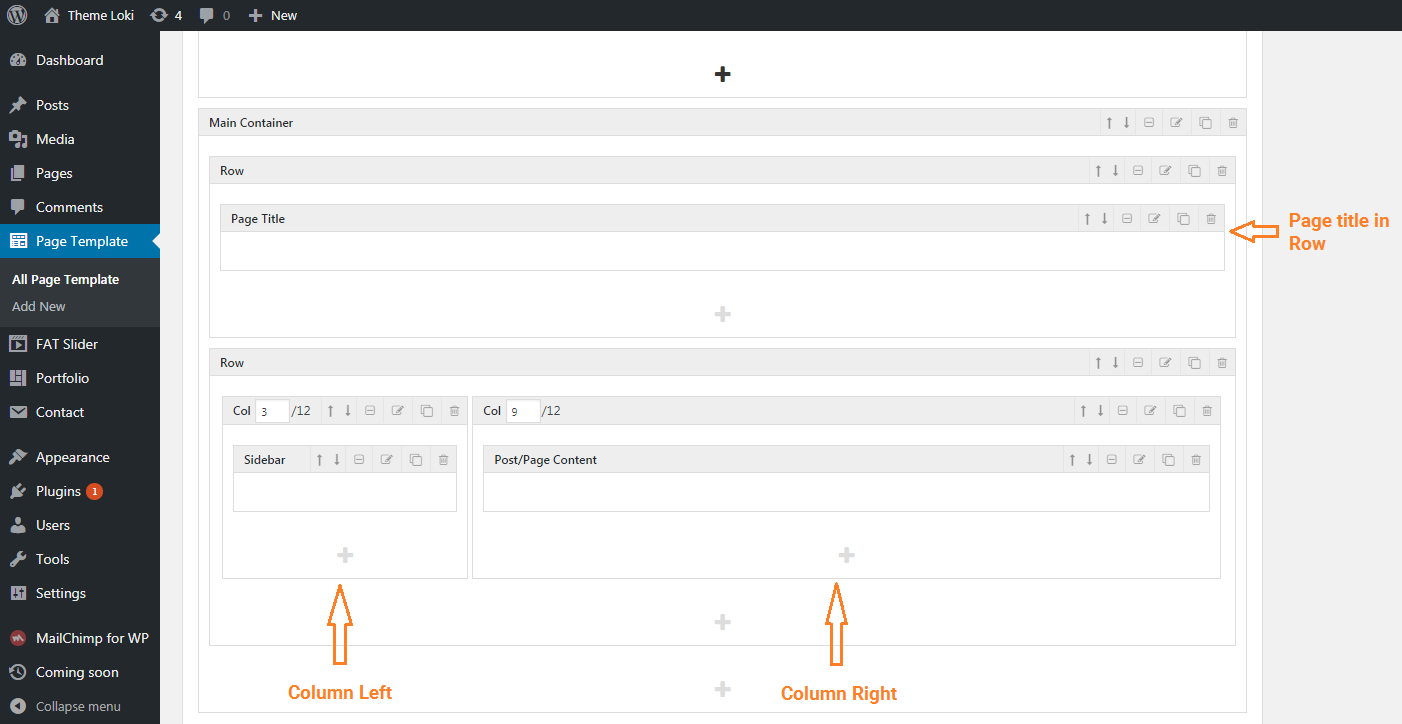
The next step, you need add row and column element to add page title and page/post content
- Add Page Tile: Please add row into main container and add page title shortcode into row
- Add Sidebar and Page/Post Content: Please add second row into main container. At here you can divide content into two section: Left and content. Please add two column element, the first column is 'Col 3/12' and the second is 'Col 9/12'. To set column stay in line, you need choose columns what have total width equal 12. Ex : 'Col 3/12' and 'Col 9/12'