FAT Services Booking Documentation
visit roninwp.comBookings
When you have completed your employee(s) and service(s) setup, your clients will be ready to start booking appointments. In order to book an appointment, you or your customer need to choose a service, an employee that will provide the service, available date, and available time slot. You can create and manager appointment at here
To create and manager appointments, please do follow:
- Log into your WordPress admin panel.
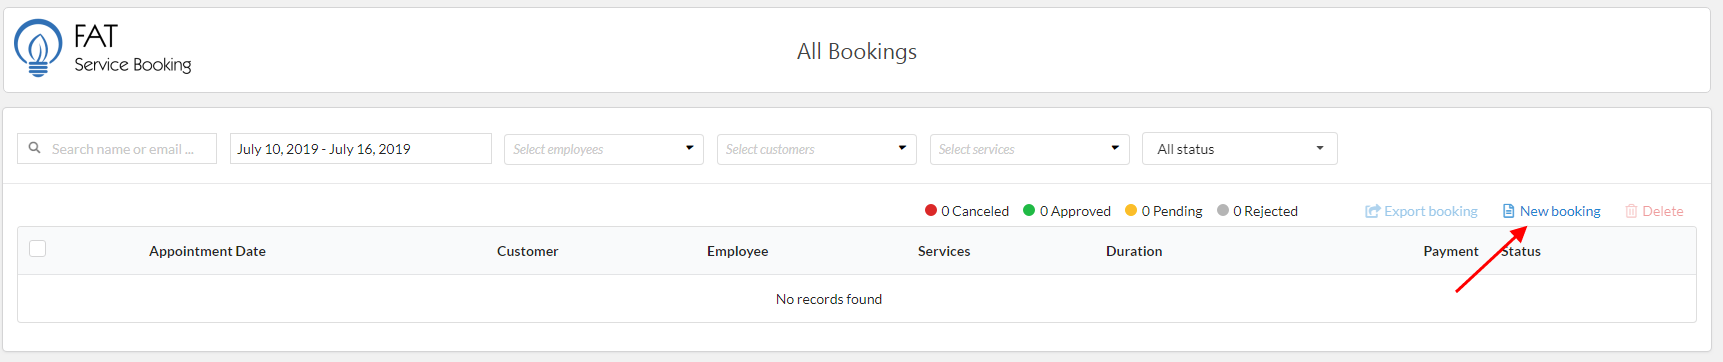
- Navigate to FAT Services Booking » Booking.
- Click 'New Booking' in right screen.
- Fill booking info.
- Click 'Save' button to save booking info.
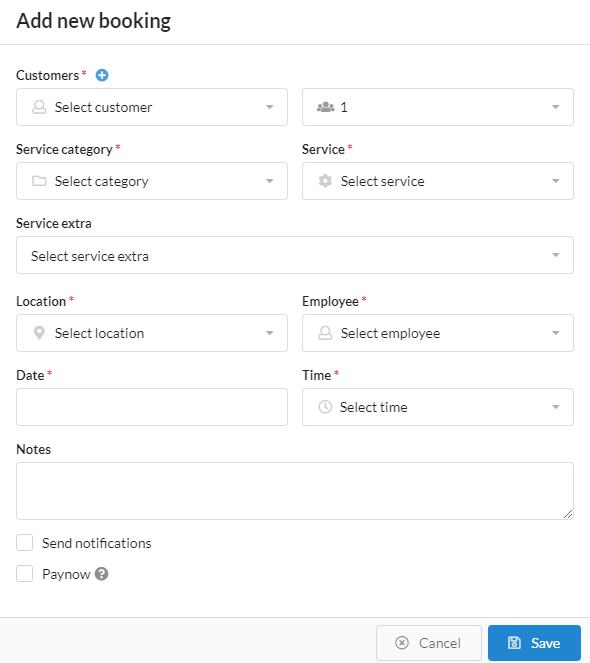
- Customer: Please select customer who need booking at here. If they are new customer, you can create new customer by click plus icon after 'Customers' label
- Number of person: At here you can execute single book ( 1 person) or group book (many persons). At default it will be display 1, when you select service and employee, it will be display value from 'Minimum Capacity' and 'Maximum Capacity' of employee
- Services category: This is filter. After select service category, plugin will be filter service belong this category and display in 'Service' list.
- Service: Please select service what your client want book .
- Service Extra: This is service extra and it will be display based on the service you selected.
- Location: This is location where your client want to go.
- Employee: After select location, it will be display all of employee who provide service at this location. You need select employee, plugin will be get free time slot of this employee and bind to 'Date' and 'Time' in next field.
- Date: This is date that your client want to book. It will be have disable date and enable date. The disable date is date that your employee are vacation or don't have free time slot .
- Time: At here, you can select free time slot of employee
- Send notifications: If check here, plugin will be send email notification after click 'Save' button
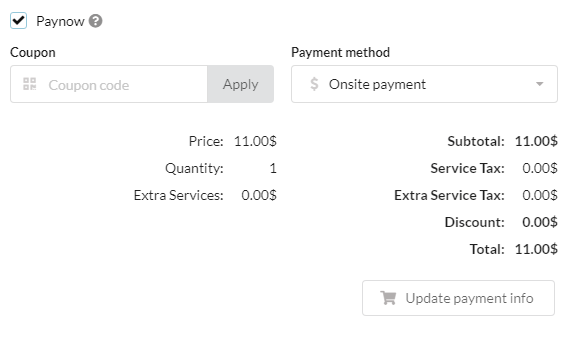
- Pay now: If you client pay onsite, please check at here. It will be show full payment detail
- Coupon: If your client have coupon, you can fill coupon and click 'Apply' button, plugin will be check and re-calculated total fees
Edit or delete coupon
After create coupon, if you want edit or delete coupon, please hover mouse on coupon item. The 'edit' or 'delete' icon will be appearance in top right corner of item. Please click 'edit' icon if you want edit, or 'delete' icon if want delete

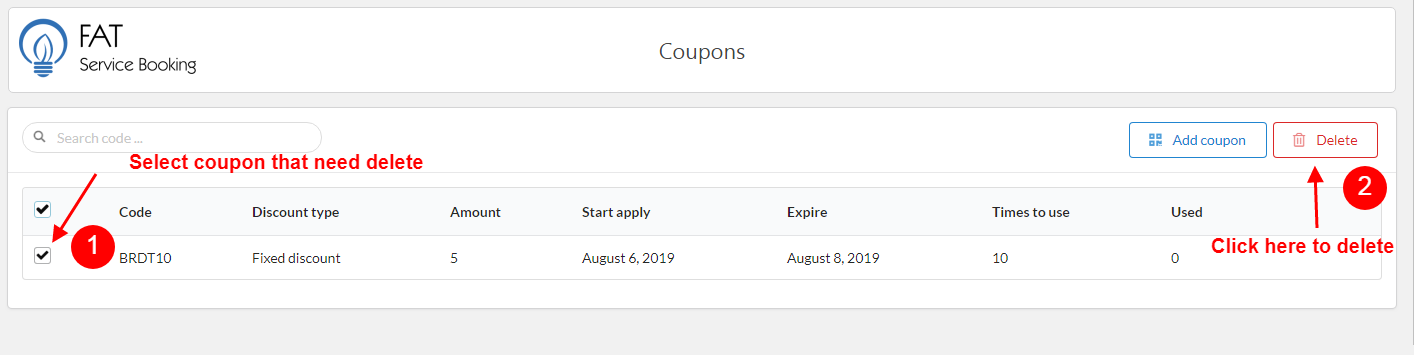
To delete coupon, it have two options to delete:
- The first option: Hover on coupon item, the 'delete' icon will be appearance at right. Click 'delete' icon to delete
- The second option: With this option, you can delete multiple coupon. Check at item what you need delete, click 'Delete' button on top right corner