Email Template
To send email notification, you need to configure email settings at here
Every time a customer creates an appointment, an email will be sent to the customer
It has four types of notifications for customers and employees: Appointment Pending, Appointment Approved, Appointment Rejected, Appointment Canceled
- Booking Pending: By default, when a client creates an appointment, it has a pending status and this email is sent when the appointment is created. You will need to manually confirm it at the back-end by update appointment status
- Booking Approved:This is email will be sent when the administator updates the appointment status to approved, or when client creates an appointment from the frontend and you have set 'Default Appointment Status' to 'Approved' in General settings
- Booking Rejected: This is email that will be sent after the appointment is rejected by the administrator
- Booking Canceled: This is email that will be sent after the appointment is canceled by the administrator
- Get Customer Code: This is email that will be sent when customer request their customer code. This code is used to display booking history
To set up email templates, please follows:
- Log into your WordPress admin panel.
- Navigate to Revy » Email Template.
- Select and set templates for each appointment status .

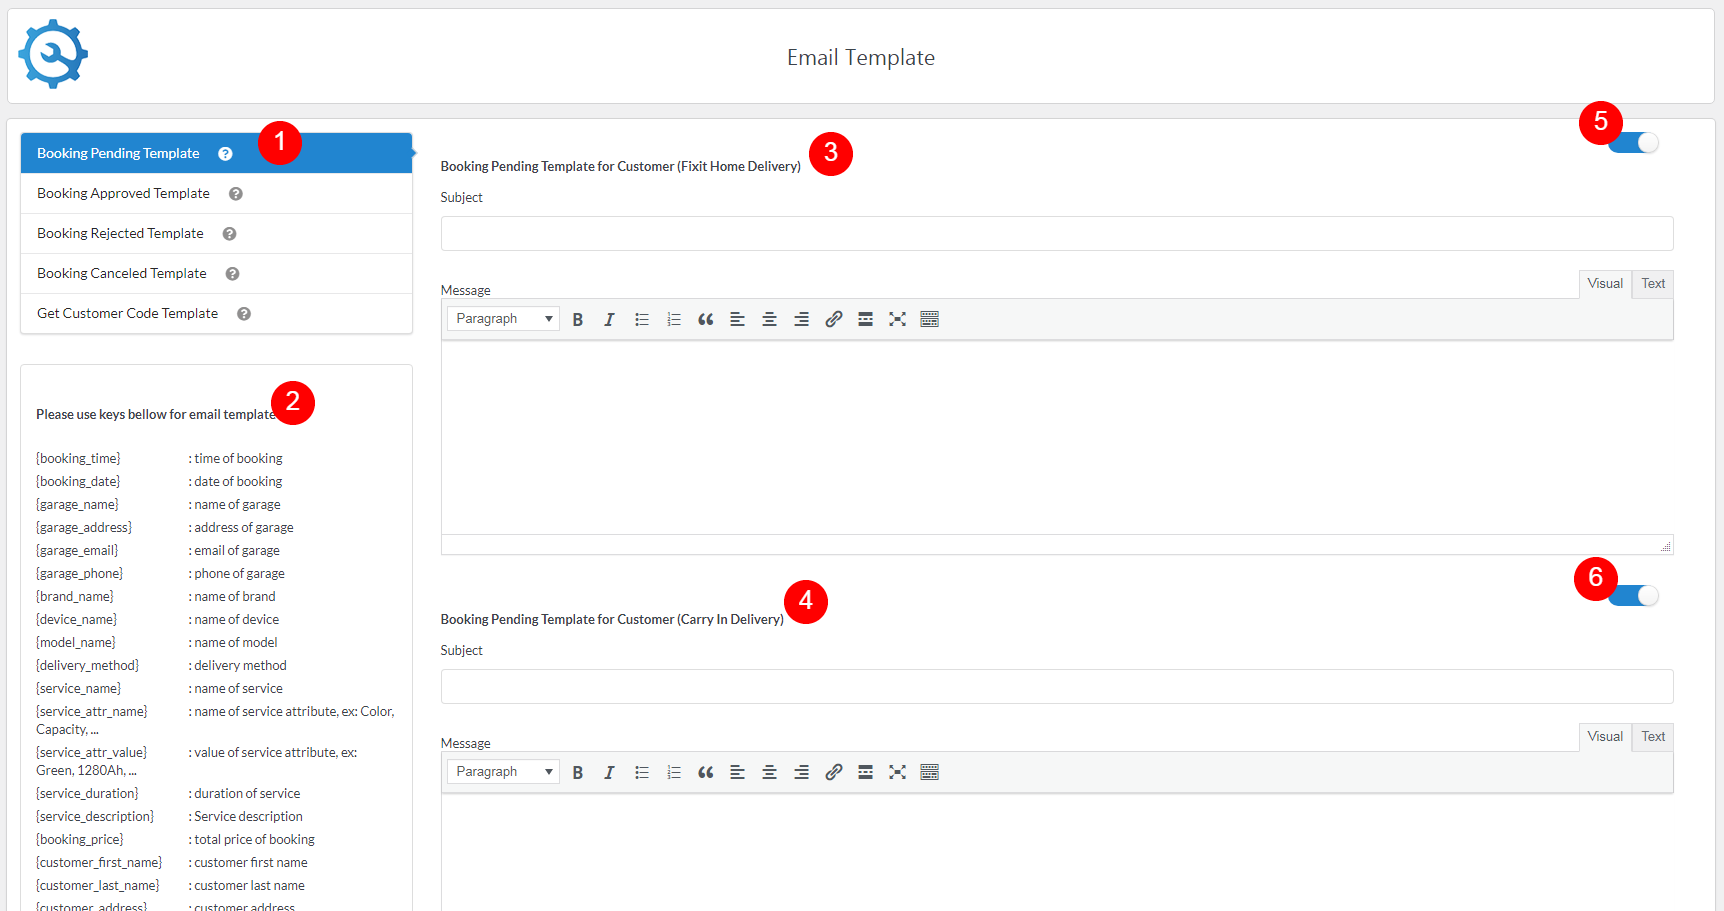
- 1. Template:Here, you can switch templates for each appointment status (Pending, Approved, Rejected, Canceled)
- 2. Keys: There are keys that you can use in the email template. It will be replaced with the corresponding value from the reservation information when emailing
- 3.Template for single booking mode: This is the section where you can configure email for customers who create appointment with single booking mode. You can enable/disable mailing to customers through the green switch button (5).
- 4.Template for group booking mode: This is the section where you can configure email for customers who create appointment with group booking mode. You can enable/disable mailing to customers through the green switch button (6).
If you face and issue, and cannot find an answer in the documentation, feel free to submit a
support ticket!
Open ticket
