FAT Event Documentation
visit roninwp.comHow to create event
This section will gives you explanation on how to create event
- Log into your WordPress admin panel.
- Navigate to FAT Event » Add Event.
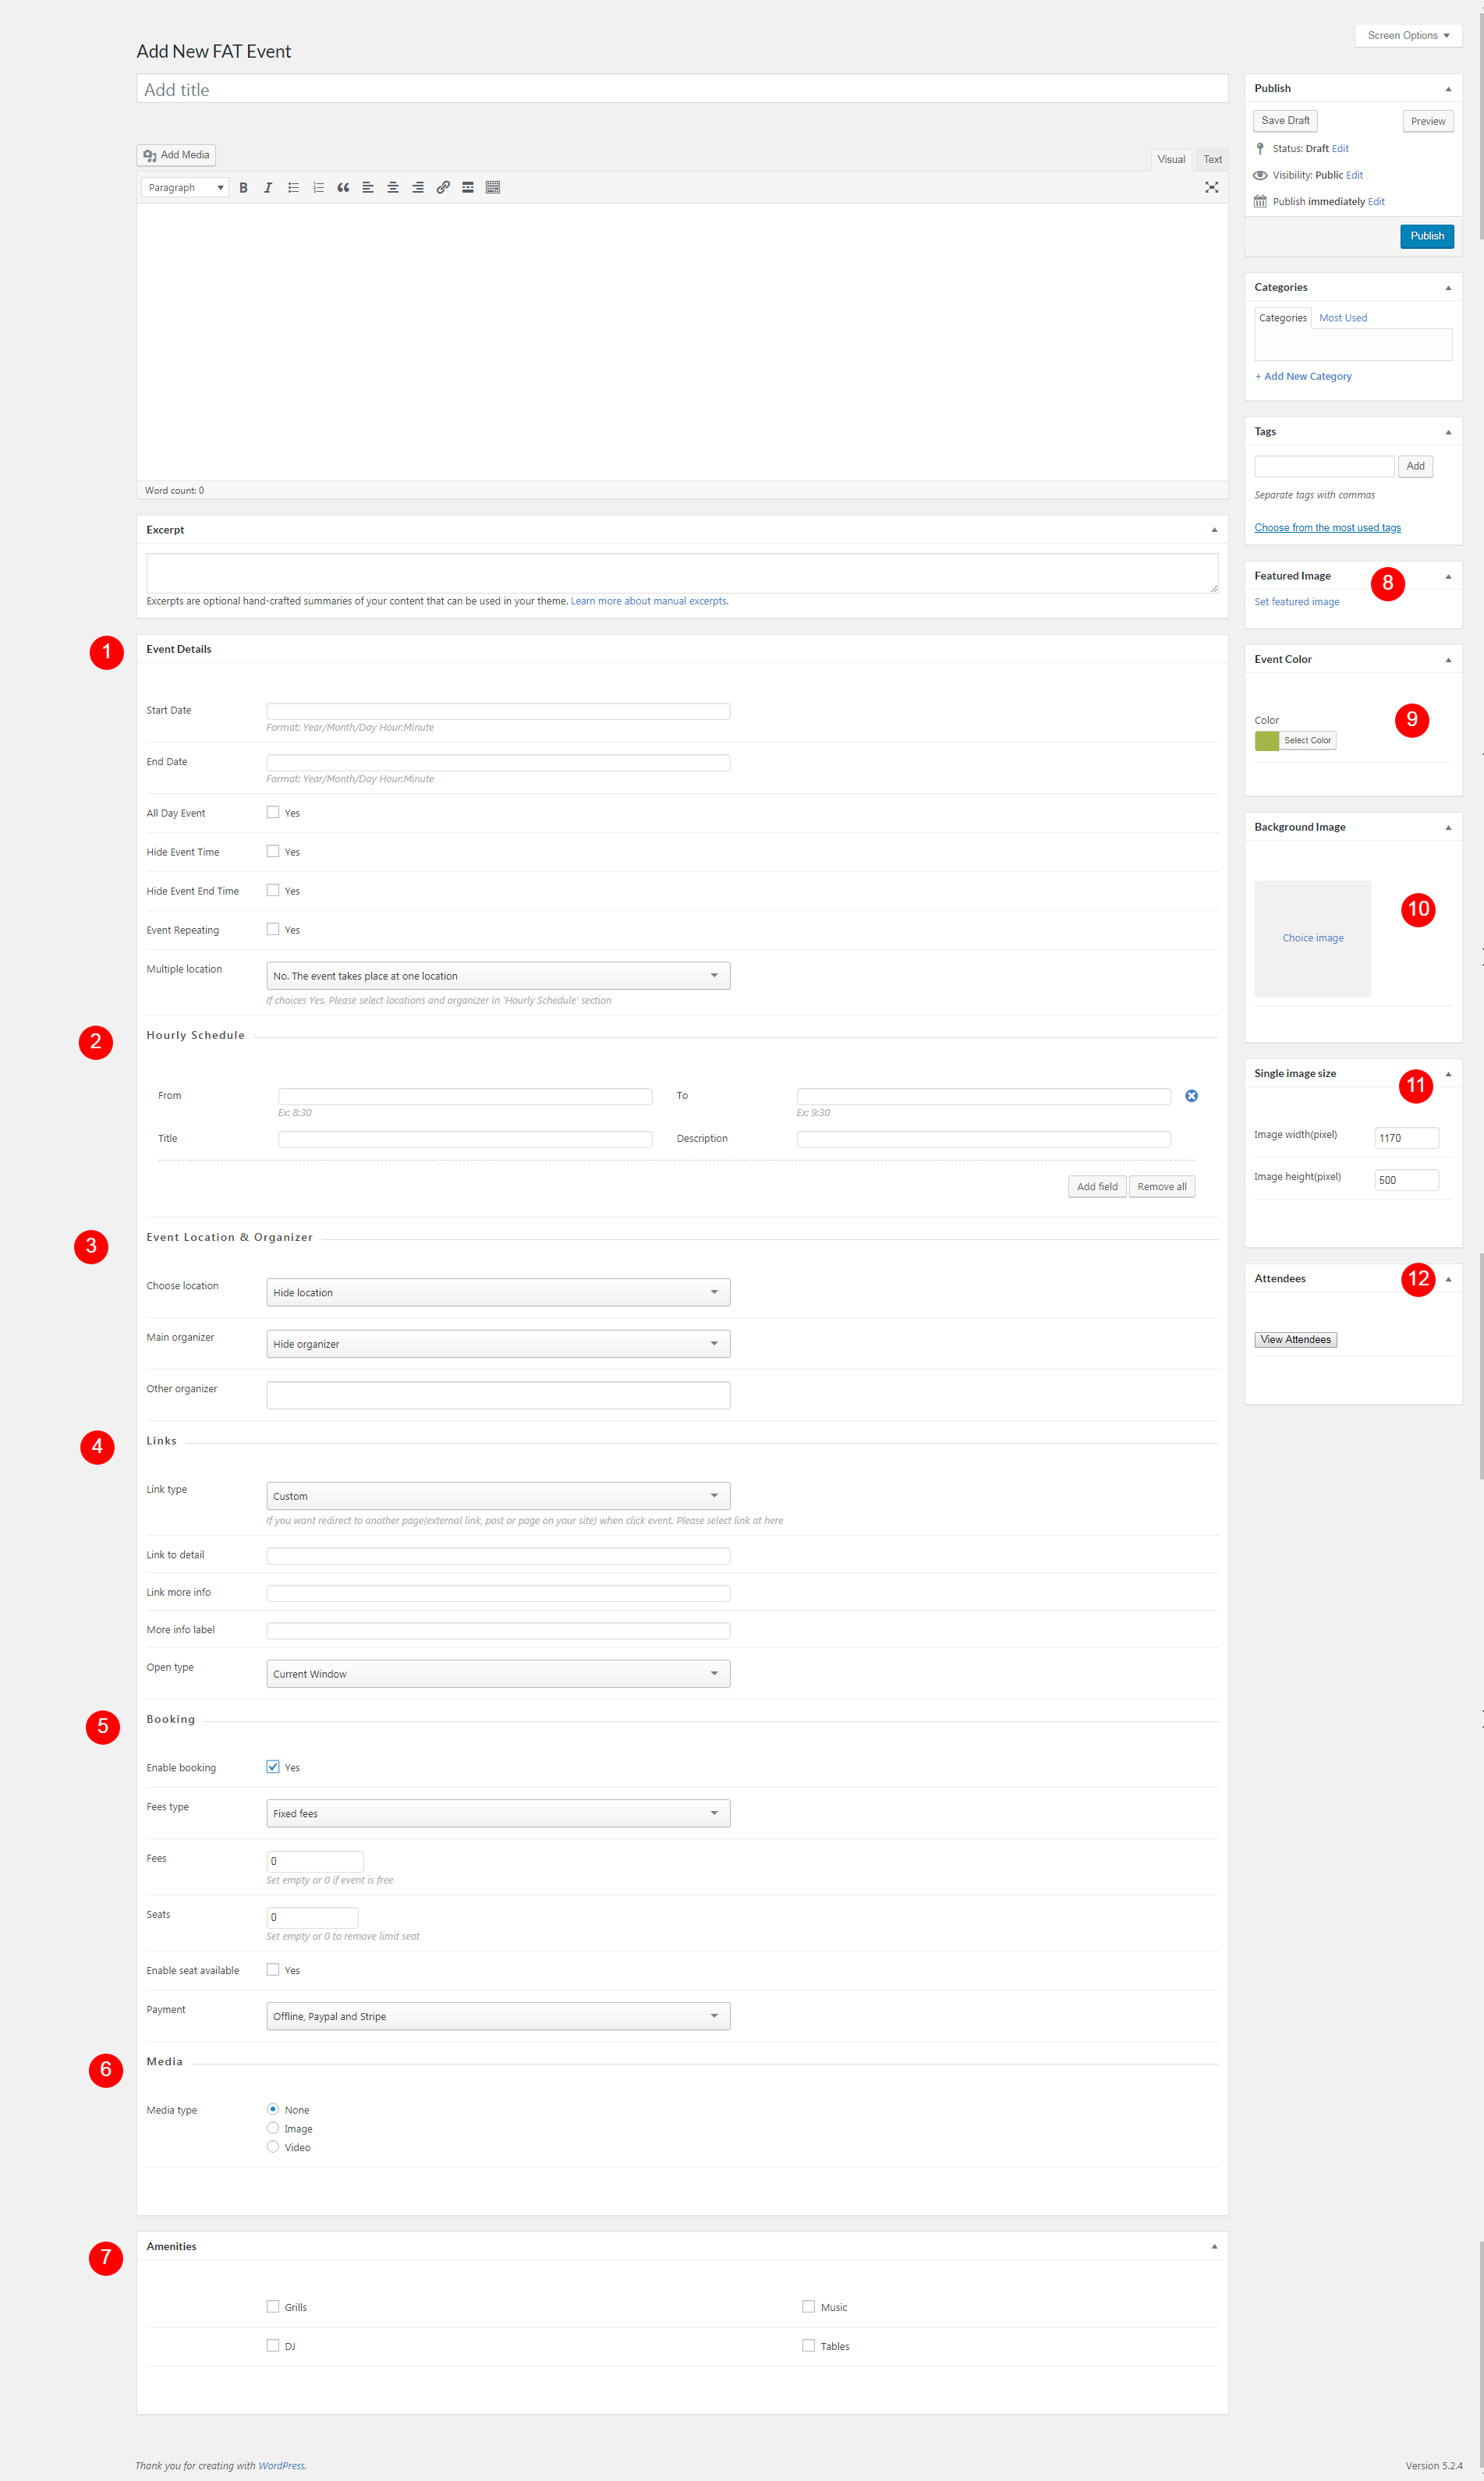
- 1. Event Detail:
- Start Date: You can set startdate time in there.
- End Date: You can set end date time in there.
- All Dat Event: If check this, it mean event start from 0:00 AM and ending in 11:59PM
- All Dat Event: If check this, it mean event start from 0:00 AM and ending in 11:59PM
- Hide event time: This feature hidden event time in single event page.
- Hide event end time: This feature hidden event end time in single event page.
- Event Repeating: If check this, you can set repeating for event by daily, weekly, monthly, yearly or you can set by pick multiple day
- Repeat interval: This is time to delay before show up next event
- Repeat event display: This is number of future event will be display. Ex: If you have event occur at 15-Sep-2018 and repeat by daily, repeat interval is 2 and repeat interval is 3 then it only show event in: 15-Sep-2018, 17-Sep-2018 and 19-Sep-2018. If repeat event display is 5 then it will be show event at: 15-Sep-2018, 17-Sep-2018, 19-Sep-2018, 21-Sep-2018, 23-Sep-2018
- Multiple location: If the event is in multiple locations, you can install it here. If select 'Yes. Events taking place in many locations', you need pick location in 'Hourly Schedule' section
- 2. Hourly Schedule:
If you want show up more detail about event schedule, please click 'Add field' and input hourly schedule
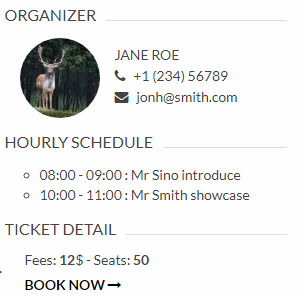
Output hourly schedule. - 3. Event location & Organizer:
Select event location and organizer which show up map on event detail popup and single event page. If you want add new location or organizer, please select 'Add new location' or 'Add new organizer'
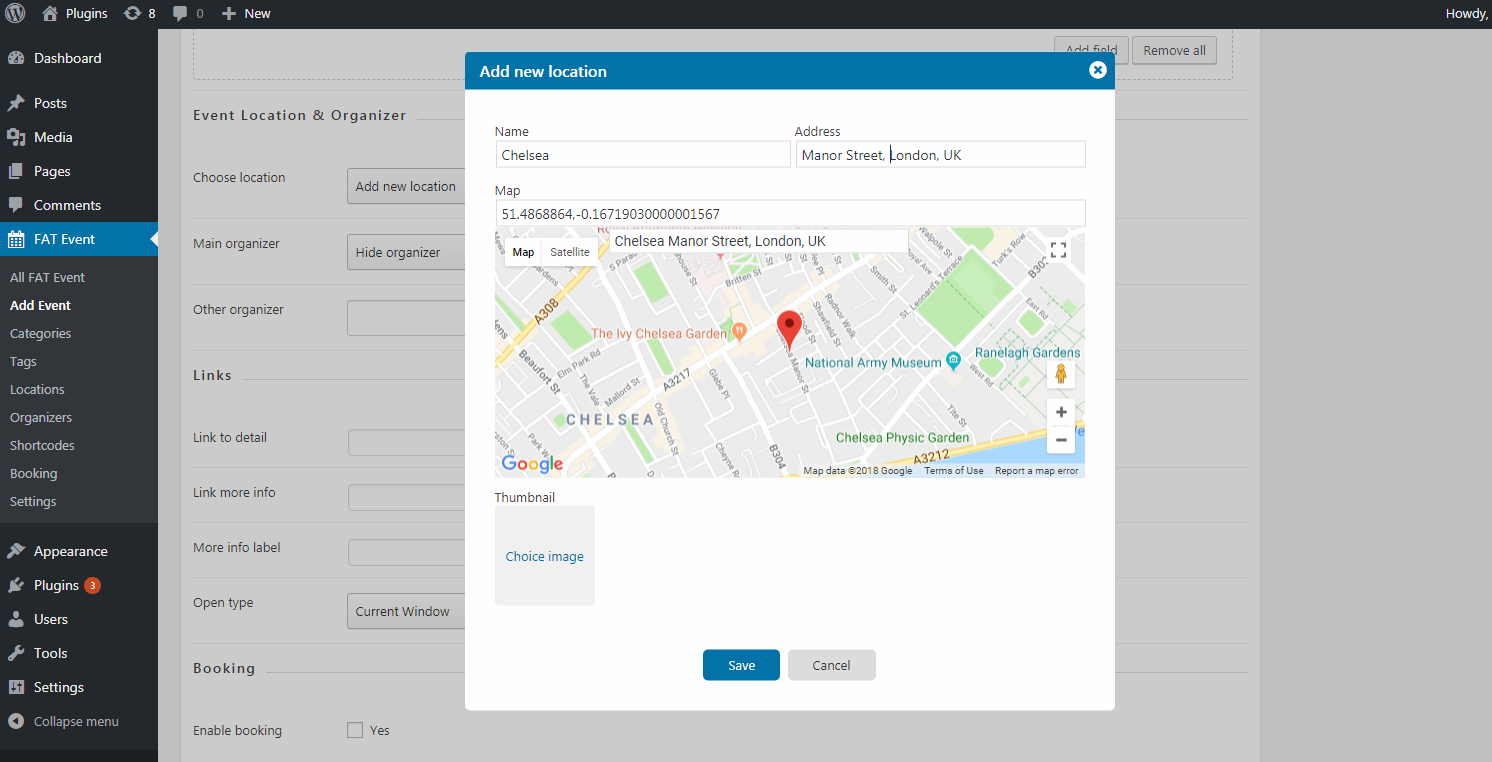
Popup add new location. 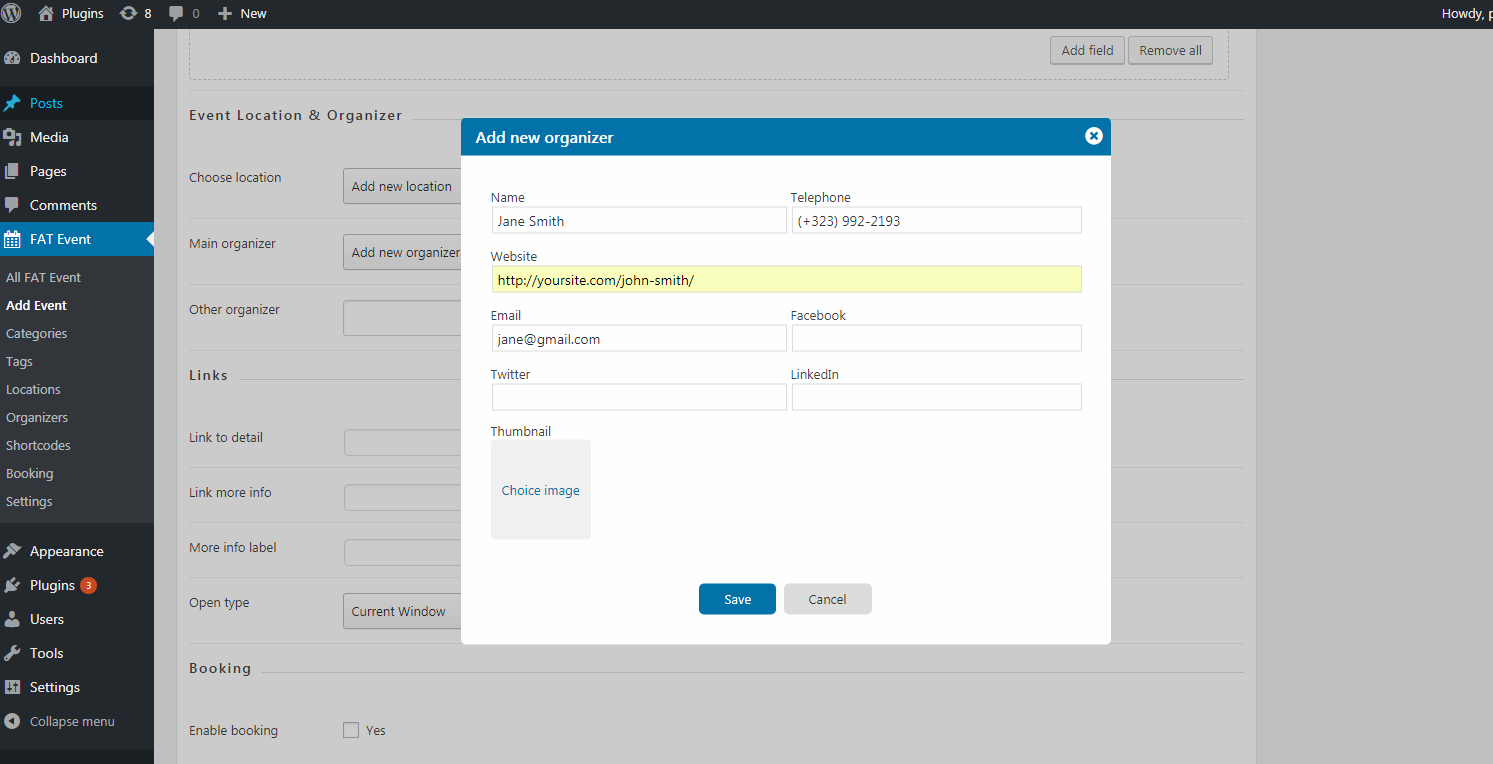
Popup add new organizer. - 4. Links:
At this section, you can set external link for event or config open single event by popup or single page
- 5. Booking:
At this section, you can set fees and allow booking, payment method (offline, paypal, or link to another ticket booking)
- 6. Media:
If you want add gallery (image or video) for event, please choose image and video at here
- 7. Amenities:
At here, you can select amenities item that event have
- 8. Feature image:
This is image shown in event detail page
- 9. Event color:
It is same as background image
- 10. Background image:
In some layout (countdown, list view), the event will be show background image. In this case, please choose background image at here
- 11. Single image:
At default, single image is 1170x500 (pixel), but if you want change image size for single event page, you can set at here
- 12. Attendees:
In some case, if you want view and export list attendees, please click 'View Attendees' button